
This article will teach you how to edit order templates, including managing quantities, dates, forecasting, and cloning product settings in Supplyit.
Overview
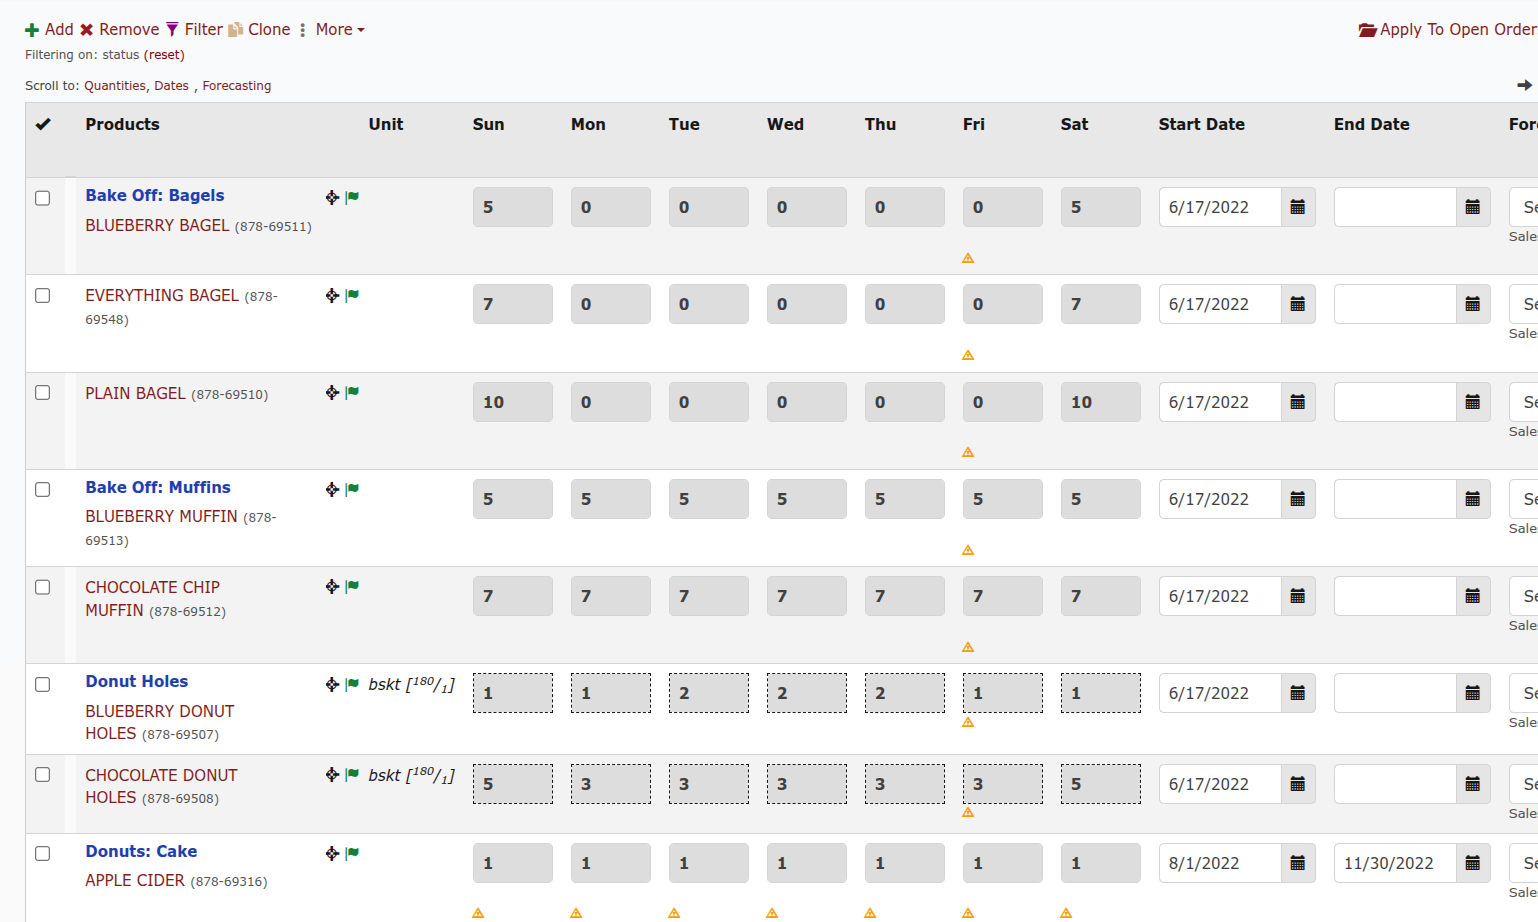
Your order template is what Supplyit uses to create daily orders. Within a template, you can set product quantities for each day of the week, define start and end dates, and configure forecasting rules.
Forecasting Note: If forecasting is enabled, your generated daily orders will be based on forecasting algorithms and sales history rather than the static amounts entered on your template.
Page Navigation: The template editor features two scrollbars: use the right scrollbar to move vertically and the bottom scrollbar to move horizontally.
Prerequisites
Workflow Navigation: If you use Workflows navigation, click Activities under the left navigation menu before starting.
Selecting a Template to Edit
Click Activities -> Orders in the left menu.
Select the Templates tab.
Choose the template type from the top of the screen:
Purchase: Orders bought from a kitchen or supplier.
Sales: Products made for other stores or customers.
Work: Products made for in-store production.
Click Edit to the right of the template you want to modify.
Entering Quantities
In the Scroll to: menu above the template, select Quantities.
Locate the product you want to edit.
Click the box for the target day of the week and enter the desired quantity.
Click Save Changes.
Tip: To quickly enter amounts for the entire week, enter a value in the Sunday column and press Tab to advance through the remaining days.
Setting Start & End Dates
In the Scroll to: menu above the template, select Dates.
Locate the product you want to edit.
Set the Start Date to the first day the item should appear on orders.
Set the End Date to the last day the item should appear on orders.
Click Save Changes.
Important: Only enter an End Date if you want the product to stop appearing on orders after that date.
Kitchen Overrides: Dates set by the supplier/kitchen override dates set on purchase order templates (e.g., if you set a start date of the 1st but the kitchen sets the 5th, the product will not be available until the 5th).
Configuring Forecasting Details
In the Scroll to: menu above the template, select Forecasting.
Locate the product you want to edit.
Check the Standard box in the forecasting column to enable forecasting.
Enter your target buffer:
Waste Factor: Enter as a percentage.
Waste Minimum: Enter as a fixed piece count.
Click Save Changes.
Advanced Forecasting: Accounts with advanced forecasting will display a dropdown menu to choose between Sales or Standard forecasting. Selecting Sales exposes a Day Span field to the right of the Waste Minimum column.
Cloning Information Between Products
Select the checkbox to the left of the product you want to copy from (source item).
Select the checkboxes for all destination products you want to copy the settings to.
Click Clone in the menu above the template.
Select your Source product from the drop-down menu.
Check the specific information boxes (Quantities, Dates, or Forecasting) you wish to copy.
Click Clone Using Selected Source.
Click Save Changes.

Tips & Best Practices
Updating Existing Orders: Saving template changes only affects newly created future orders. To update existing open orders with these changes, click the red Apply To Open Orders link after saving.